Additional sizes may be available!
Additional sizes may be available! Email me when availableOverview
| * | Expansion module for all AquaController Apex controller systems |
| * | Provides additional pH or ORP and temperature probe ports |
| * | Expand existing monitoring capabilities or monitor an additional aquarium |
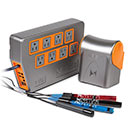
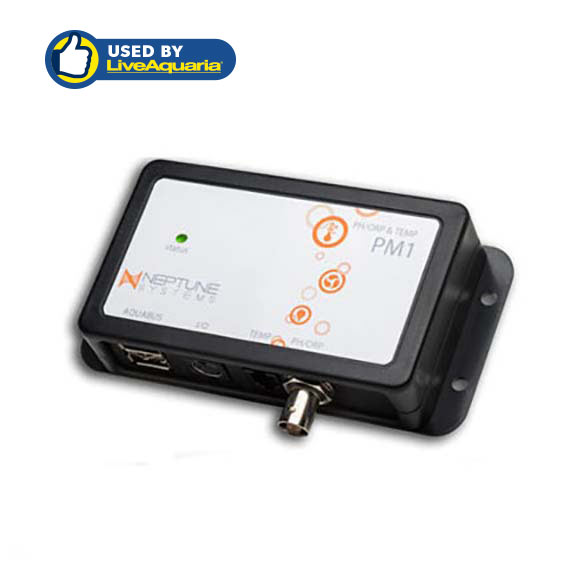
Expand the monitoring and control capabilities of your AquaController Apex Controller System with ease. Neptune Systems AquaController Apex PM1 pH/ORP Probe Module provides additional pH or ORP and temperature probe ports PLUS six I/O switch inputs for ATO, feed buttons, float switches, water sensors, flow sensors and more!
Neptune Systems AquaController Apex PM1 pH/ORP Probe Module offers the perfect solution for monitoring and controlling new equipment upgrades to your existing system whether it's a new calcium reactor system or an ozone generator. Also, perfect for independent monitoring and control of multiple aquariums.
Features
- Monitor/Control pH or ORP, and temperature.
- 6 digital inputs for float switches, water on floor sensors, pressure sensors, etc.
- Full data logging support in Apex Base module.
- Up to 240 AquaBus modules can be added to the Apex system.
- Plug and Play. Automatically recognized when installed into the Apex system.
- Two AquaBus connectors for flexible expansion via AquaBus
- LED Status Indicator.
- Upgradeable firmware.
- Compatible with all Apex systems.
- Galvanic Isolation for accurate and reliable probe readings.
- Comes with 3 ft AquaBus cable
Physical Installation
The AquaController Probe Module 1 should be securely mounted in a location free from moisture. Use wood screws through the mounting tabs of the probe module case or if mounting on drywall, use drywall anchors (mounting hardware not included).
- Mount all modules above the water line of the aquarium.
- Be sure to utilize drip loops on all power cords, AquaBus cables and probe cables.
WARNING: Water damage will void your warranty! Mount all modules in locations safe from moisture exposure.
Initial Connections
Plug one end of the included AquaBus cable into one of the AquaBus ports on the Probe Module and the other end into an available AquaBus port on your existing Apex system. It makes no difference which AquaBus port is used and you do not need to power down the system when connecting AquaBus accessories as the system is plug-and-play.
WARNING: NEVER plug standard USB devices into any AquaBus connector or AquaBus accessories into computer USB ports. Damage to the AquaBus accessory and/or USB device may result.
AquaController Apex Probe Module 1 Setup Guide
Connect the pH or ORP probe (must be purchased separately, available from your Neptune retailer) to the port labeled pH/ORP on the Probe Module 1. Push the BNC female connector on to the male connector and turn 1/4 turn clockwise to lock the connector in place.
If you are using a temperature probe with the Probe Module 1 (must be purchased separately, available from your Neptune retailer), plug in to the port labeled Temp on the Probe Module and place the other end of the Temperature Probe in the aquarium water in an area of medium to high flow
NOTE: The temperature probe needs to be in the same area as the pH probe if temperature compensation is to be used.
Startup
As soon as the Probe Module is connected to an active AquaBus, the Probe Module will power up and begin to initialize. When first connected to an AquaController Base Module (through the AquaBus), the Probe Module will automatically be assigned an AquaBus address and be added to the AquaController configuration. The LED Status indicator on the Probe Module will flash yellow while it is being initialized. Once initialized, the LED Status indicator will be solid green. The LED Status indicator will flash yellow when the Probe Module is powered on and communication with the AquaController Base Module is lost.
Verify the Installation
Verify the probe module was initialized and added to the AquaController Apex configuration:
Apex Display: Setup > Module Setup > Modify Name - From this screen, you can see all AquaBus modules installed on the system.
Web Interface: Configuration> Module Setup - Verify the probe module is listed in the Apex Module List.
Update Probe Module Firmware
A new version of firmware for Probe Modules may be included with Apex Base Module firmware updates. You should check the firmware version status when the Probe Module is first installed and after updating the AquaController Base Module firmware. See the section titled Updating Firmware in the AquaController Apex Setup and Programming Guide for instructions to update AquaController Apex Base Module and probe module firmware.
To check or update an Apex module firmware:
Apex Display: Setup> Module Setup> Update Module - Use the Up/Down arrows to highlight the Apex module to update, push Select to update.
Web Interface: Configuration> Module Setup - In the Module Configure area, in the Module: box, select the Apex module to update from the dropdown list, click the Update Firmware radio button, click the Submit Module Update button, a new browser window will open to display the update status.
Configure the PM1
The PM1 includes one standard Apex temperature probe port (temperature probe not included, available from your Neptune retailer) and a galvanically isolated port that can support either a pH or ORP probe. Once the PM1 is connected to the AquaBus of your Apex system, the system will automatically add the PM1 to the Apex configuration. If you wish to use the PM1 port for a pH probe, follow the steps listed in the section titled "pH Probe Setup" below. If you intend to use an ORP probe, skip to the section titled ORP Probe Setup later in this manual.
pH Probe Setup
pH probes connected to Probe Modules will be identified as "pHx3", "pHx4" and so on. The number in the probe name corresponds to the AquaBus address assigned to the Probe Module.
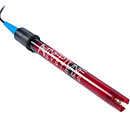
If not already done, connect the pH probe (must be purchased separately, available from your Neptune retailer) to the port labeled pH/ORP on the PM1. Push the BNC female connector on to the male connector and turn 1/4 turn clockwise to lock the connector in place.
Remove the cap from the pH probe and discard the solution in the cap. All new probes should be rinsed in clean tap water before placing in the aquarium. Place the pH probe in an area with high flow that is continuously wet (not an overflow that may drain dry, for example). Maintain a drip loop in the wire back to the Probe Module.
WARNING: It is not recommended to fully submerge the pH probe, as this will cause the probe to fail prematurely.
NOTE: Do not let the tip of the pH probe dry out, as damage to the probe will result. If you are not using your pH probe for an extended period, make sure the tip is submerged in Probe Storage solution at all times. If storage solution is not available, tap water can be used (RO/DI water should not be used).
To enable the pH probe:
Apex Display: Setup> pH Setup> pH Enable - Use the up/down arrow keys to choose the port you wish to configure, press Select, then use the up/down arrow keys to select on/off for that port, press Save when done or Exit to discard changes.
Web Interface: This option is not available from the Web Interface.
The pH probe can be configured to automatically adjust the pH to compensate for changes in tank temperature. To enable/disable this feature:
Apex Display: Setup> pH Setup> Temp Comp: Off - Press Select to toggle temperature compensation on and off.
Web Interface: This option is not available from the Web Interface.
NOTE: If temperature compensation is to be used on the PM1, a temperature probe must be connected and enabled on the PM1. The system temperature probe cannot be use for temperature compensation of a probe connected to a PM1.
pH Probe Calibration
pH probes need to be calibrated to perform properly. The following procedure should be repeated periodically to keep your pH reading accurate as pH probes tend to drift out of calibration over time. As the pH probe ages, it will drift out of calibration very quickly or may not be capable of being calibrated at all. If this occurs, it will be necessary to replace the pH probe.
NOTE: If you wish to use the automatic temperature compensation feature, you should enable it before calibrating your pH probes. In this case, it is important for the calibration solution to be at the same temperature as the temperature probe at calibration time. Also, a temperature probe must be connected and enabled on the PM1. The system temperature probe cannot be use for temperature compensation of a probe connected to a PM1.
The Apex system uses a 2-point calibration system, which results in very accurate readings between the 2 points and less accurate readings outside the points. Choose the calibration solutions based on the range of pH the probe is expected to read. See the table below for recommended calibration solutions:
| Expected Range | Low Solution | High Solution | |
| Freshwater Aquarium | 6.0-7.5 | 4.0 | 7.0 |
| Saltwater Aquarium | 7.8-8.5 | 7.0 | 10.0 |
| Calcium Reactor | 6.5-7.0 | 4.0 | 7.0 |
NOTE: For best results, use pH calibration solutions in packets as the solution in bottles tend to shift pH after they have been opened.
To calibrate a pH probe:
- Acquire the proper pH calibration-solution packets and place in aquarium water (unopened) to acclimate them to the system temperature. If automatic temperature compensation is to be used, place the temperature probe connected to the PM1 in the same aquarium water with the calibration packets.
- From the Apex Display, open the pH calibration menu: Setup> pH Setup> pH Calibrate.
- Use the Up/Down arrow keys to choose the probe you wish to calibrate, press Select or OK.
- Use the Up/Down arrow keys to select the value of the Low Calibration Solution used, push Select.
- Dry the Low Calibration Solution packet off and carefully open the corner of the low solution, just enough to get the pH probe inserted in the packet.
- Remove the pH probe to be calibrated from the tank, rinse it in probe storage solution (or tap water), gently shake the excess solution off the probe, and place the probe in the Low Calibration Solution. Periodically swirl the probe in the solution to ensure an accurate reading. Ensure the probe is submerged in calibration solution at all times.
- Wait for the low reading to stop changing. This may take a few minutes up to 5 minutes depending on the type and condition of pH probe being calibrated. The value of the reading while calibrating may not match the value of the solution being used, this is normal. Once the reading has stabilized, press Select or OK.
- Use the up/down arrow keys to select the High Calibration Solution used, push Select.
- Dry the High Calibration Solution packet off and carefully open the corner of the low solution, just enough to get the pH probe inserted in the packet.
- Remove the pH probe from the Low Calibration Solution, rinse it in probe storage solution (or tap water), gently shake the excess solution off the probe, and place the probe in the High Calibration Solution. Periodically swirl the probe in the solution to ensure an accurate reading. Ensure the probe is submerged in calibration solution at all times.
- Wait for the high reading to stop changing. This may take a few minutes up to 5 minutes depending on the type and condition of pH probe being calibrated. The value of the reading while calibrating may not match the value of the solution being used, this is normal. Once the reading has stabilized, press Select or OK.
- The Apex system will use the calibration measurements to calibrate the pH probe.
- The calibration fluid can be used to calibrate more than one probe; however, the pH calibration fluid should be discarded after use as they will degrade over time after opening.
If the calibration measurements were not accurate or were out of range, the calibration may fail, which will be indicated on the Apex Display. In this case, the default calibration settings will be used. You can attempt the calibration procedure again. However, this usually indicates that the pH probe is too far out of range and should be replaced.
pH Probe Maintenance
pH probes should be periodically cleaned and recalibrated for best performance. It is not recommended to clean the probes unless calibration is to be performed. The period between cleanings is up to the user but typically, every 1-3 months is normal. To clean the probe, gently brush the sides and tip of the probe with a soft brush to remove any debris. Rinse the probe in tap water. Soaking the probe in acid (vinegar) or alkali (borax) solution to remove mineral deposits is not typically needed but can be used to try and bring back an old probe that cannot be calibrated. Typical lifespan for a pH probe in aquarium use is 12-24 months.
ORP Probe Setup
ORP probes connected to Probe Modules will be identified as "ORPx3", "ORPx4" and so on. The number in the probe name corresponds to the AquaBus address assigned to the Probe Module.
If not already done, connect the ORP probe to the port labeled pH/ORP on the PM1. Push the BNC female connector on to the male connector and turn 1/4 turn clockwise to lock the connector place. To remove the probe, turn 1/4 turn counterclockwise and gently pull the connector straight off the base module.
All new probes should be rinsed in clean tap water before placing in the aquarium. Place the ORP probe in an area with high flow that is continuously wet (not an overflow that may drain dry, for example). Maintain a drip loop in the wire back to the Apex Base or Probe Module.
NOTE: New ORP probes typically read low and require a break-in period. It may take as long as a week to break-in the ORP probe. During this break-in period, control functions based upon ORP are not recommended.
WARNING: It is not recommended to fully submerge the ORP probe, as this will cause the probe to fail prematurely.
To enable ORP probes:
Apex Display: Setup> ORP Setup> ORP Enable - Use the Up/Down arrow keys to choose the port you wish to configure, press Select, then use the up/down arrow keys to select on/off for that port, press Save when done or Exit to discard changes.
Web Interface: This option is not available from the Web Interface.
ORP Probe Calibration
ORP probes do not need to be calibrated to operate properly; they should operate normally for the life of the probe without calibration. However, the AquaController Apex includes the ability to perform a 2-point calibration if desired.
Special calibration solution must be made from standard pH 4.0 and 7.0 calibration solution by dissolving Quinhydrone powder in the solutions. Simply dissolve Quinhydrone powder into the 4.0 and 7.0 solutions until the powder no longer dissolves. Adding too much powder does not harm anything, it just wastes the powder.
To calibrate an ORP probe:
- Create the ORP 4.0 and 7.0 solutions as described above.
- From the Apex Display, open the ORP calibration menu: Setup> ORP Setup> ORP Calibrate.
- If you have more than one ORP probe enabled on your system, use the up/down arrow keys to choose the probe you wish to calibrate, press Select or OK.
- Remove the ORP probe to be calibrated from the tank, rinse it in tap water, gently shake the excess water off the probe, and place the probe in the 7.0/Quinhydrone Calibration Solution. Periodically swirl the probe in the solution to ensure an accurate reading. Ensure the probe is submerged in calibration solution at all times.
- Wait for the 7.0/Quinhydrone reading to stop changing. This may take a few minutes up to 5 minutes, depending on the type and condition of ORP probe being calibrated. The value of the reading while calibrating may not match the value of the solution being used, this is normal. Once the reading has stabilized, press Select or OK.
- Remove the pH probe from the 7.0/Quinhydrone Calibration Solution, rinse it in tap water, gently shake the excess water off the probe, and place the probe in the 4.0/Quinhydrone Calibration Solution. Periodically swirl the probe in the solution to ensure an accurate reading. Ensure the probe is submerged in calibration solution at all times.
- Wait for the high reading to stop changing. This may take a few minutes up to 5 minutes depending on the type and condition of ORP probe being calibrated. The value of the reading while calibrating may not match the value of the solution being used, this is normal. Once the reading has stabilized, press Select or OK.
- The Apex system will use the calibration measurements to calibrate the ORP probe.
- The calibration fluid can be used to calibrate more than one probe; however, the ORP calibration fluid should be discarded after use as they will degrade over time after opening.
If the calibration measurements were not accurate or were out of range, the calibration may fail, which will be indicated on the Apex Display. In this case, the default calibration settings will be used. You can attempt the calibration procedure again. However, this usually indicates that the ORP probe is too far out of range and should be replaced.
ORP Probe Maintenance
ORP probes should be periodically cleaned for best performance. The period between cleanings is up to the user but typically, every 1-3 months is normal. To clean the probe, gently brush the sides and tip of the probe with a soft brush to remove any debris. Rinse the probe in tap water. Soaking the probe in acid (vinegar) or alkali (borax) solution to remove mineral deposits is not typically needed but can be used to try and bring back an old probe that has stopped working.
Switch Inputs
The PM1 has a Mini DIN8 connector for switch inputs labeled I/O. These inputs can be used for switches, float switches, water sensors, flow sensors, etc. Switch inputs connected to Probe Modules will be identified as Switchx3_2, Switchx5_3, etc. The first number in the switch name corresponds to the AquaBus address assigned to the probe module. The second number corresponds to the switch input number (1-6).
WARNING: Do not apply voltage to the switch inputs or damage to the AquaController Apex may occur.
Connect switches to the AquaController Apex by connecting one wire from the mechanical switch to the ground pin (pin 8), and the other wire from the switch to one of the six digital inputs (pin 1-6). Connections can be easily made using a Neptune I/O Breakout box available at your local Neptune Retailer. The breakout box features spring-loaded connectors to make connections easy without tools or soldering.
The Apex and accessory inputs are TTL level (5V) inputs with internal pull-up resistors. With nothing connected, the switch inputs will indicate OPEN (Logic 1-5V). When connected to Ground (Pin 8), the switch will indicate CLOSED (Logic 0-0V).
Switch Inputs are programmed using the If Switch command. For example, if you wanted to turn a pump on when a float switch closes, you would add this command to the pump outlet program:
If Switch1 CLOSED Then ON
See the section titled Appendix 3 -Programming Reference and Appendix 4-Advanced Programming Examples in the Apex Setup and Programming Guide for more information.
Programming
pH probes connected to probe modules will be identified as "pHx3", "pHx4" and so on. The number in the probe name corresponds to the AquaBus address assigned to the probe module.
ORP probes connected to probe modules will be identified as "ORPx3", "ORPx4" and so on. The number in the probe name corresponds to the AquaBus address assigned to the probe module.
If a temperature probe is connected to the probe module, it is identified as "Tmpx3", "Tmpx4", etc. with the same AquaBus number as the pH/ORP probe.
Switch inputs connected to probe modules will be identified as Switchx3_2, Switchx5_3, etc. The first number in the switch name corresponds to the AquaBus address assigned to the probe module. The second number corresponds to the switch input number (1-6).
NOTE: The pH and ORP readings from the PM1 can be added to the Apex Display and Web Interface Status Screens. See the section titled Display Setup in the Apex Setup and Programming Guide for more information.
The following are some valid program statements (assumes that probe module is installed and configured on AquaBus address 4).
If pHx4> 8.20 Then ON
If ORPx4> 400 Then ON
If Switchx4_2 CLOSED Then OFF
Please see the Programming Outlets section of the Apex Setup and Programming Guide for more information on programming the AquaController Apex.


